Chapter 9
| Jurisdiction | United States |
"I strive for two things in design: simplicity and clarity. Great design is born of those two things."
Lindon Leader, strategic design consultant
A. Being Self-Sufficient
In this chapter, we work from the assumptions that either you want to design your litigation visuals or you do not have any desire to do so but lack the budget to hire a professional designer and thus must create it yourself out of necessity. Here we examine software programs that you could take advantage of to design graphics even if you have no artistic talent. Naturally, if you are an artist, you may be fully capable of creating visuals freehand. Also, in this chapter, we explore software that can be employed to record, edit, and create video evidence.
A caveat deserves mentioning here. While an attorney can create the litigation visual, if it will be necessity to call a witness regarding this exhibit, it is advisable for an investigator or support person make the visual or be able to explain the process and any software that was employed because counsel cannot testify.
B. SmartDraw Overview
If your case calls for a diagram of a floor plan, landscape, a crime scene, a timeline, or some other graphic, and you don't have a budget for graphics, SmartDraw1is for you. SmartDraw is a software product recognized by the courts.2
SmartDraw has a library of over 5,000 clip art graphics that can be used to construct demonstrative evidence. It is relatively inexpensive for a yearly online subscription by comparison with what it usually would cost to have a graphic artist create it, and no artistic skills are required. You could also purchase a download of SmartDraw for Windows, but it will be more expensive. SmartDraw offers an academic discount for law professors and law students for the online subscription and for the download. SmartDraw permits you to try the software for seven days.
With SmartDraw software, you produce a demonstrative that is designed with simplicity, clarity, and accuracy. You can create demonstrative evidence for pretrial negotiations and trial. As was discussed in Chapter 8 "Evidentiary Predicates," for the demonstrative evidence to be admissible, the three prerequisites for admissi-bility must be satisfied. The exhibit must be shown to be authentic and relevant, and must pass the Evidence Rule 403 tests (its probative value cannot be "substantially outweighed by a danger of one or more of the following: unfair prejudice, confusing the issues, misleading the jury, undue delay, wasting time, or needlessly presenting cumulative evidence"). Therefore, you will need to design the demonstrative evidence with the aid of witness(es) who can at trial testify to the exhibit's relevance and further that it is a fair and accurate depiction of what the witness(es) saw. If the diagram differs in any respect, it must not be a misleading discrepancy, and the witness who is called to establish its accuracy should explain how it differs.
Once you have designed the demonstrative evidence, you have multiple options for displaying it. You can paste it into a PowerPoint slide where it can be shown in a slideshow. Alternatively, it could be printed out, enlarged, and adhered to a poster board. Or, you could place the printout on a document camera so that it will be projected on a screen.
C. Mastering SmartDraw
SmartDraw is easy to master because the templates and tools are clearly defined. When you open SmartDraw, you will see that most of the screen is filled with templates of over 70 categories of diagrams.
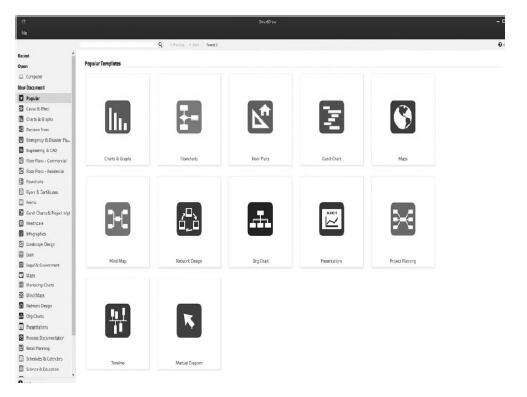
On the left side of the screen you will see a panel with the categories containing over 800 templates. With this panel you can choose the type of diagram with which you wish to work. When you click on the type of diagram, it brings up what is referred to by SmartDraw as a "smart panel" containing shapes that you can apply in constructing your diagram.

To the right of the smart panel label is a tab labeled "Symbols" that contains the library of over 5,000 pieces of clip art, and it will automatically bring up the symbols that are appropriate for the kind of diagram you intend to develop. To build your diagram, click on the object you want from the library and drag it to where you would like it placed in the diagram.
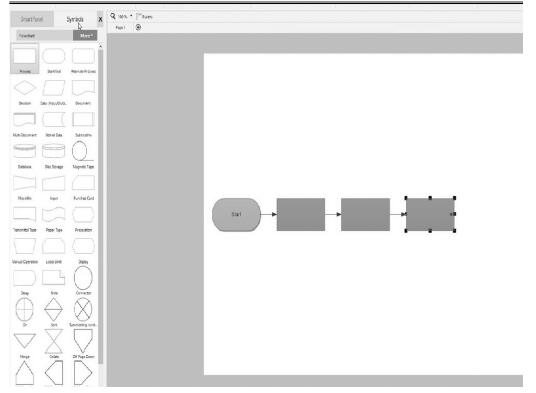
At the top of the screen on the left you will see a tool bar with the customary symbols for things such as undo, save, and print. These tabs are followed on the right by tabs that allow you to share what you have created by email or by exporting it to PDF, Word, or PowerPoint. The ribbon under the tool bar that runs across the top of the screen contains the tools that you will need to create your diagram, such as shape, line, text, and styles.
The main part of the screen is your work area where you create the diagram. As symbols are added to that area, it automatically expands to accommodate them. To add text, just click on a symbol and begin typing. By right-clicking you can access tools to work with such as inserting a picture. To add or change colors, click on the Theme tab on the ribbon and select the color you want. There are also tabs for style, effects and so on. The Design tab on the ribbon provides tools that enable you to move objects in the diagram.

After you have completed the...
To continue reading
Request your trial